The purpose of this guide is to explain the multiple options when it comes to adding Parts into your System.
There a few different options, this guide has been broken up into 4 sections which you can use as applicable for what type and how you would like to create your part.
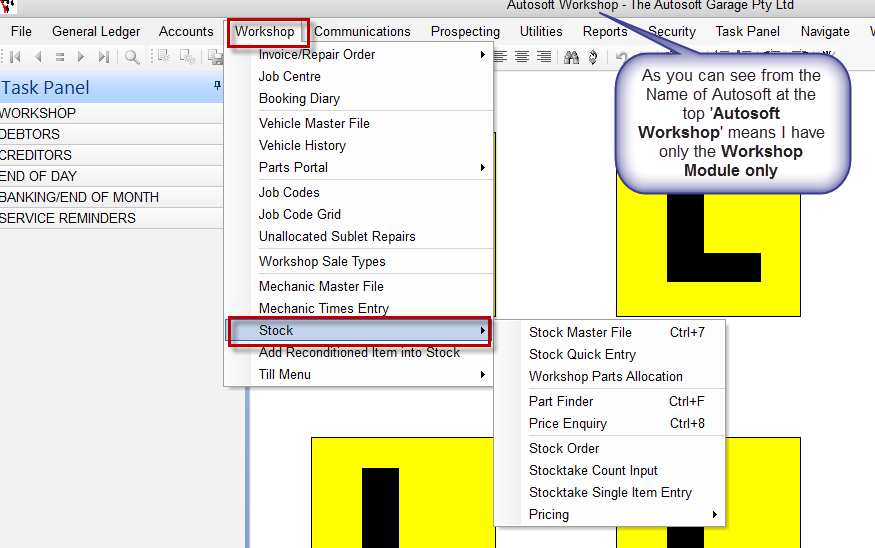
Depending on the modules you have purchased in Autosoft, your Stock section can either be found under;
- Parts - Stock
(For customers who only have the Both Parts & Workshop modules or Only the Parts Module they sell a lot of parts so need a full Parts management system. If you would like this option added to your package, please contact us)
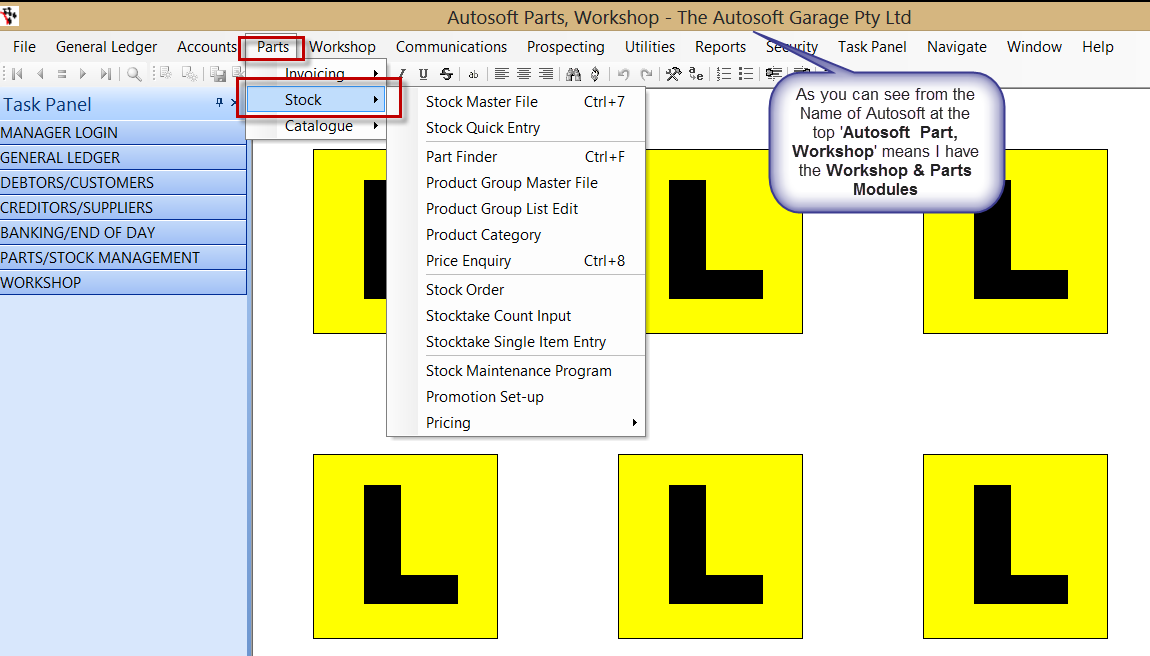
OR
- Workshop - Stock
(For customers who only have the Workshop module as their workshop primary does labour and buy-in parts so do not need a full Parts management system)
Once you are in the Stock Section, you then have 2 options of how you would like to add your Part
1. Stock Master File
- Simply add all the details of your Part as necessary
- Main Tabs to put in your info = Stock, Pricing, Cross Ref & Stock Options (see your F1 Help on what all the available options are in these tabs)
- F2 to Save
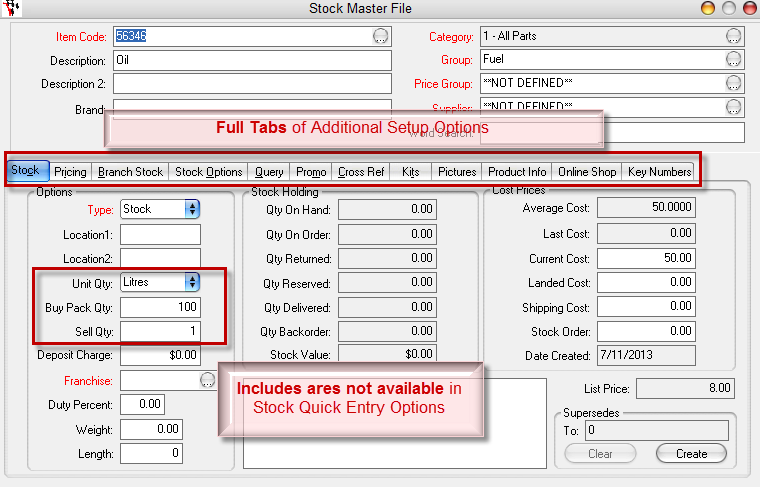
This gives you all the available options to set up your part. It is best to use this option if you need to setup Parts that come in Litres, Metres, Packs or are consumables or need any Stock Options set.
If your part is a consumable - see this guide on how to set it up http://service.autosoft.com.au/entries/22592330-How-to-keep-Track-of-Consumables
If it is bought in Pack, Litres etc - see this guide on how to set it up http://service.autosoft.com.au/entries/21571219-How-to-Manage-Stock-Bought-and-Sold-in-Packs-Qtys-Metres-Litres-Pairs-etc-
2. Stock Quick Entry
- Simply add all the details of your Part as necessary
- This give you only 1 main page of information
- Click OK OR F2 to Save
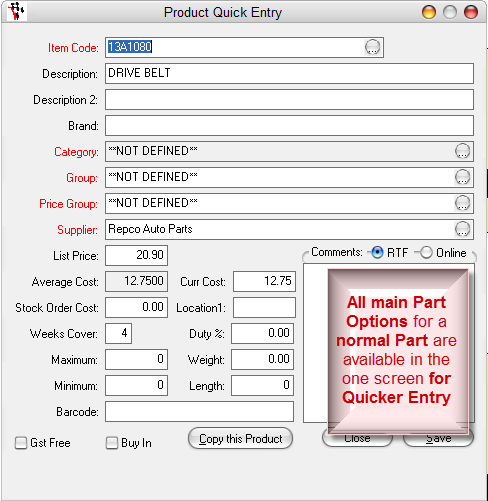
This option give you all the main options you need for a normal Part in the one screen. This is often handy when adding a range of new parts in as it is fast and you have the Copy this Product option so can easily add similar parts using this feature.
3. Within Invoicing
You can create a new part when you are in a Customer or Creditor Invoice
- In the Invoice Item Code Field - type in the Item Code of your new Part
- TAB and this will look for the existing Part in the system, and if it can not find this item code on an existing Part, it will auto prompt you; 'Item not on file, add stock to file?
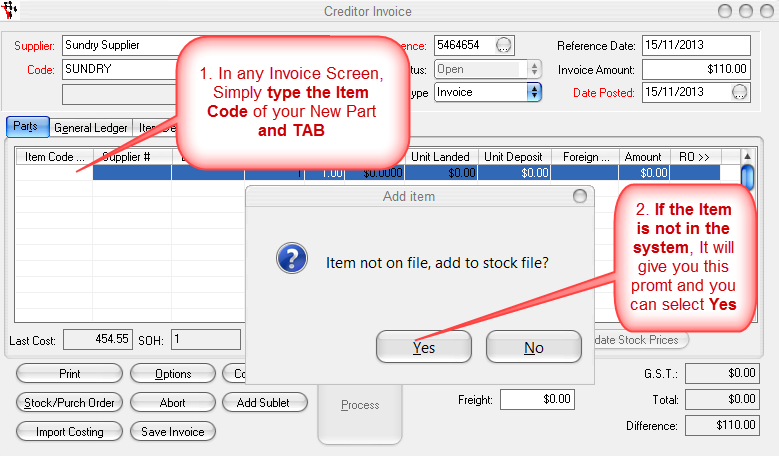
- Select Yes and you will get a similar screen to the Stock Quick Entry
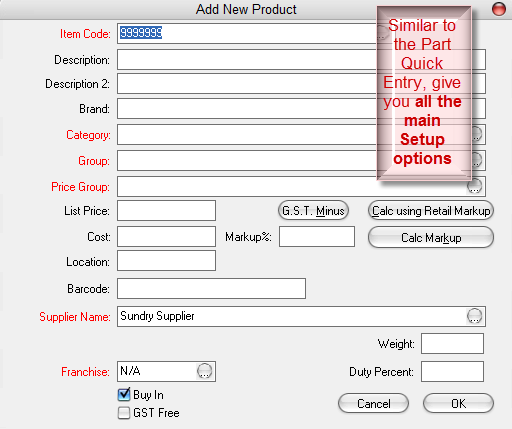
- Enter in all the details of the Part
- OK to Save and add the Part onto the Invoice.
There is also a video available on how to add and manage Parts http://www.youtube.com/watch?feature=player_embedded&v=j49OzWDEsgM
4. Creating Kits of Parts
- Job Code Kits - This type of kit can only be used on Workshop Invoices/ROs and do not take off the stock quantity until the kit is invoiced out. For the Guide on this type of kit click here; http://service.autosoft.com.au/entries/21415145-How-to-Create-a-Kit-in-Autosoft-
- Part Kits - This type of kit can be added to a Parts or Workshop Invoices/ROs and will take the stock quantity of the included parts off as soon as the kit is built. For the Guide on this type of kit click here; http://service.autosoft.com.au/entries/23565330-How-to-Create-and-Build-a-Part-Kit
Need to Create New Labour Job Codes? see this guide for how http://service.autosoft.com.au/entries/21652730-How-to-Create-More-Job-Codes-in-Autosoft
0 Comments