The purpose of this guide is to explain how to use the Workshop Part Allocation Function in Autosoft. This feature is great for companies which have a parts department and wish to have more stock control as Parts Allocation means a Parts Manager must approve a Part on the Invoice before it can be finalised by allocating it. If a part is not allocated, the system will prevent the Invoice being finalised without the Part being ‘Allocated’ to it
IMPORTANT NOTE: We highly recommend you book a consultation with us on how this area functions and how to set it up as it is only available to customers with the Part Module once enabled has System Consequences.
This process has been broken up into 3 Parts- Enabling the System File Setting to Allow for Workshop Parts Allocation, Allocating a Part to a Job and How it works with Invoicing.
Part 1 –Enabling the Workshop Parts Allocation System
NOTE: This may already be enabled and to have access to this area you must be logged in as a ‘SETUP-PRO’ access user. If you do not have access to this area please contact your manager who can log in and authorize access to this area.
a) Enabling the setting in System File
- Go to Utilities – System Setup – System File
- Parts – Tick Box Use Workshop parts allocation system
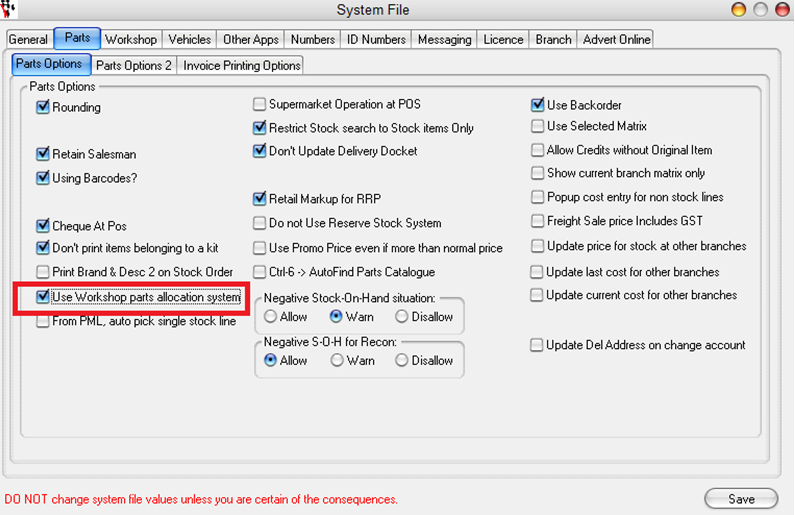
- Click Save
B) Allowing users access to this area
- Go to Security – Security Maintenance
- Select your User Group
- Tick the boxes next to Workshop Parts Allocation
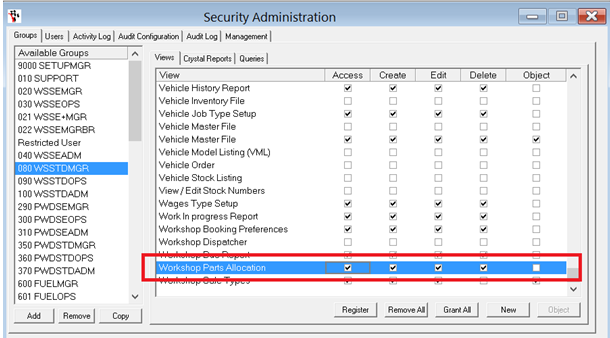
NOTE: If you need more information users and groups, we recommend you book a training consultation.
- Exit out of Autosoft and Log Back in for the change to apply
Part 2 – Allocating the Part to the Job
With this feature now enabled, a Part can be added to any Booking/RO or Invoice BUT it must be allocated before the Invoice can be finalised.
- Go to Parts– Invoicing– Workshop Part Allocation
- Enter the RO# of the Booking/RO or Invoice - Find
- If the Parts are already on the RO–Tick Boxto Allocate themOR click Allocate All
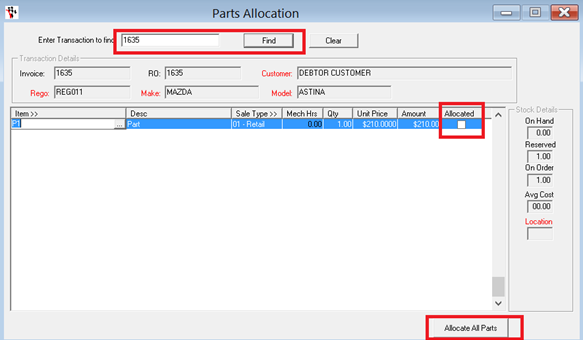
- If the Parts are not yet on the RO – Click on the next line to Add them
- F2 to Save
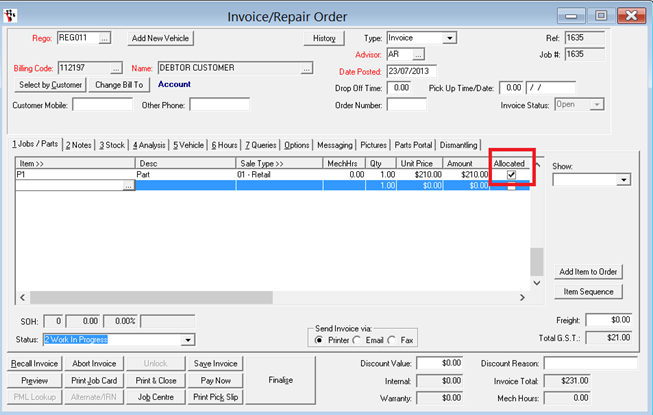
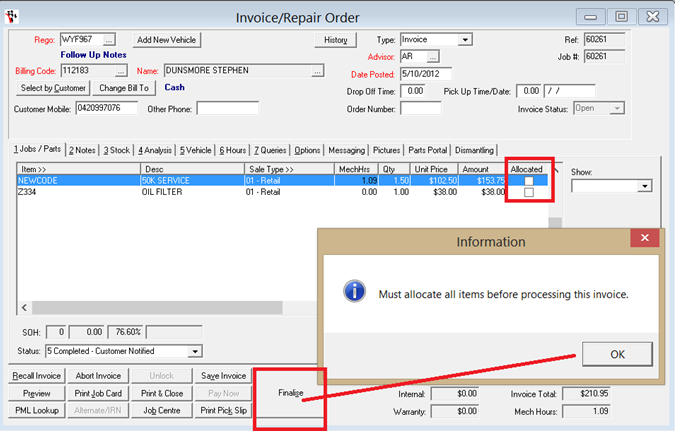
Part 3 – How it works with Invoicing
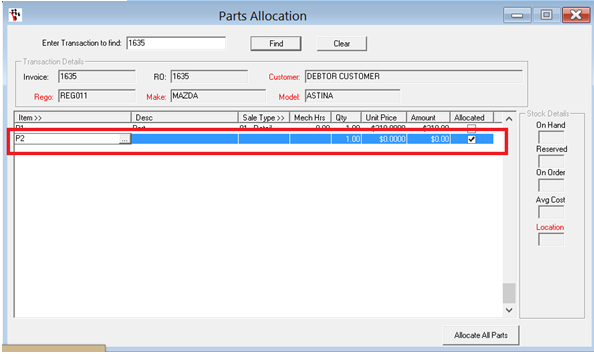
The Parts Allocated to an RO will now have a tick in the Allocated box and
If the Part Allocation Process was not followed, you will get a message when trying to Finalise the Invoice
0 Comments