The purpose of this guide is to show you how to create a new user (person who needs to login and use Autosoft) and restrict them to only accessing 1 Branch. NOTE: You have to be logged in as a ‘SETUP-PRO’ user to access this area and it also assumes you already have your Security Access Groups set.
This process has been broken up into 3 parts you can use as applicable - Creating a New User, Editing Security Access of User Groups & Restricting the User to a Branch.
1. Creating the New User
- Go to Security – Security Administration – Users Tab
- Click Add
- Type in the required Username
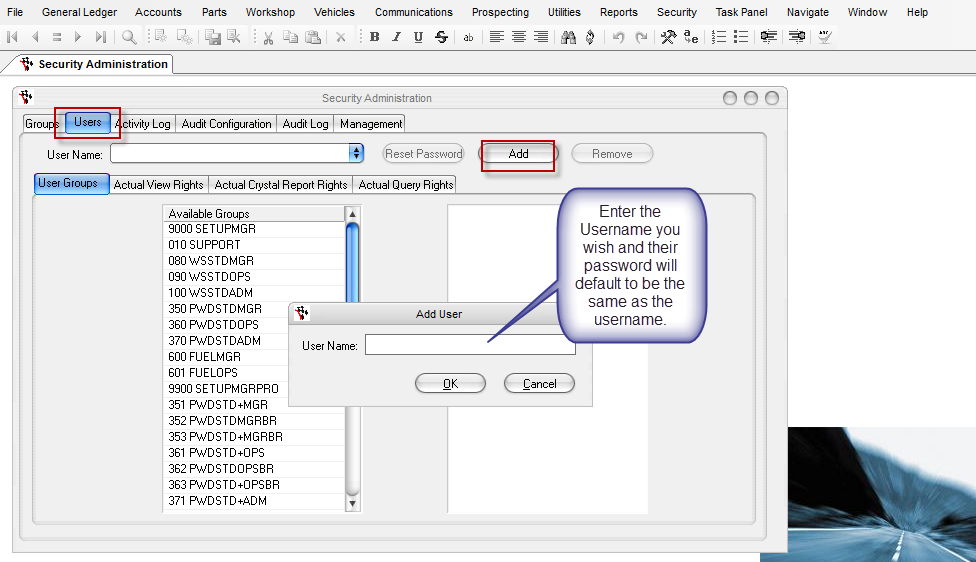
NOTE: this is the users name or number they will use to Login and it will automatically replicate this as their password. To change the users password click on Reset OR once logged in they can change it themselves by going to Security – Change Password.
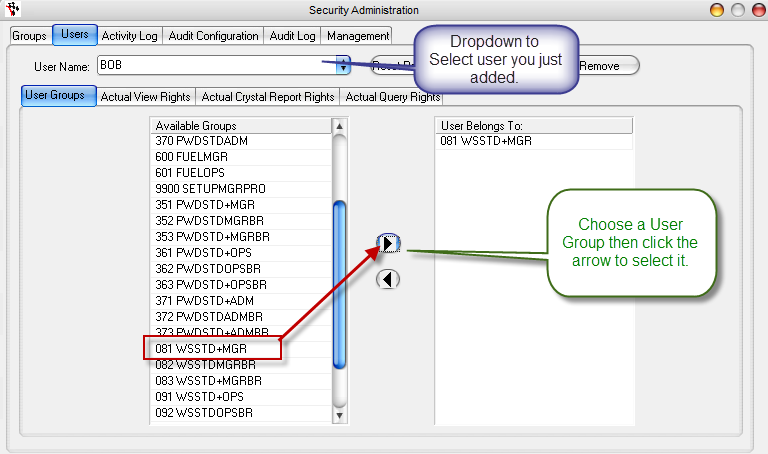
- Click the Dropdown to Select the User -
- Select the User Group you wish to set them to on the left and use the Arrow to add it to the right ('User Belongs to' column)
2. Editing the Security Access of User Groups
You can edit the level of security and features the uses have access to via the Groups tab.
- To see which group a user belongs to = In the Users Tab - Search and select the User - Check the Group the user is on
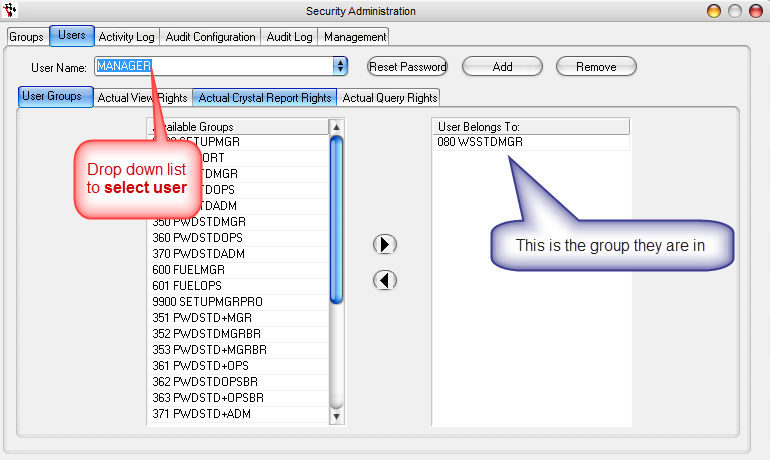
- Go to the Groups tab - Select the Group they are in
- In the View Tab - Edit What they have access to by ticking the options (ticking gives them access)
- Crystal Reports & Queries Tabs - Select which reports & queries they need access too
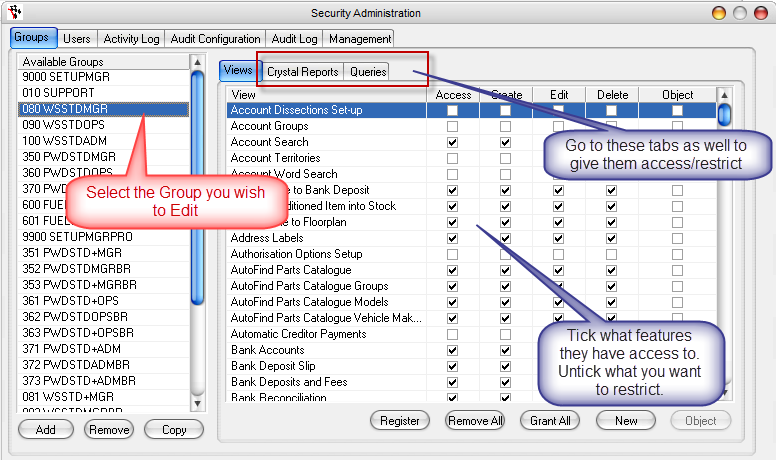
- Go back to the View Tab - Click Register to Save.
- Exit out and go back in for changes to apply.
3. Restricting the User to a Branch(if Applicable for Branch Companies)
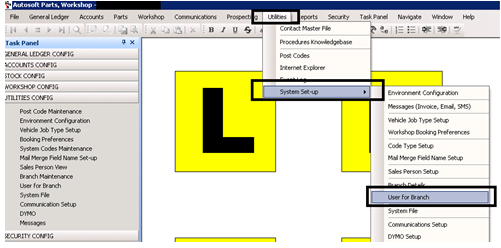
- Go to Utilities – System Setup – User For Branch
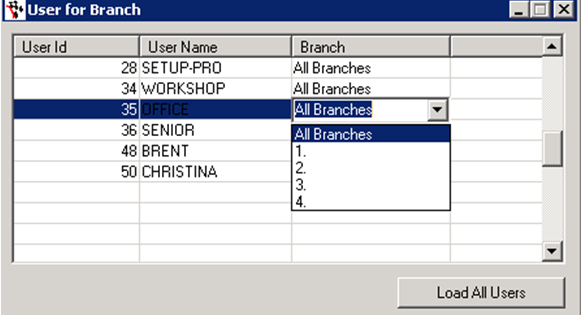
- Click Load All Users
- Select User – Pick Branch
0 Comments