The purpose of this document is to gain understanding of how to associate a barcode to an item. Adding Barcodes to parts can make searching an item more efficient and the barcode of a part can be scanned to add the part to a customer invoice, creditor invoice and/or stocktake.
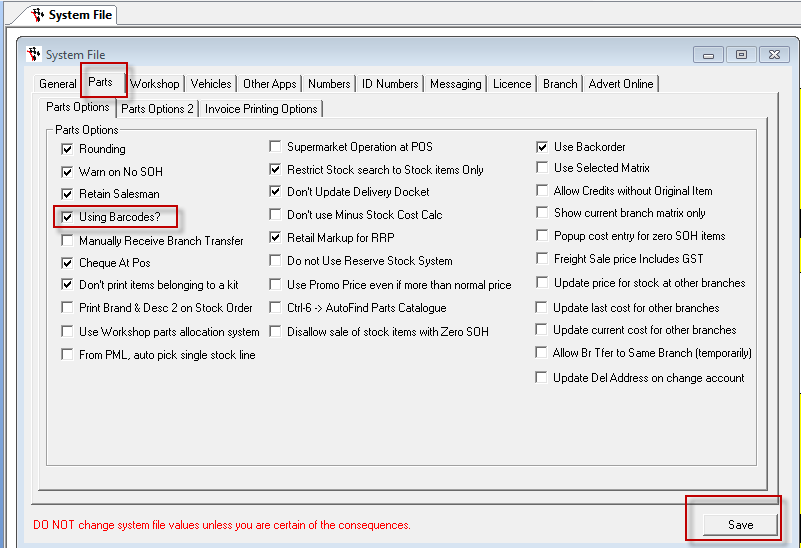
Set up System file to enable barcode use (if this has not already been setup for you)
Note: you will have to login as 'SETUP-PRO' user to have access to this area
- Go to the Utilities menu / System Set-up / System File
- Parts Tab
- Tick option 'Using barcodes?'
- Save

- Exit out of Autosoft
When a Part has a Barcode you can add the Barcode to the Parts in 2 ways;
1. Add the barcode to Part in the Stock Master File
Note: you will have to login as your normal user to have access to this area
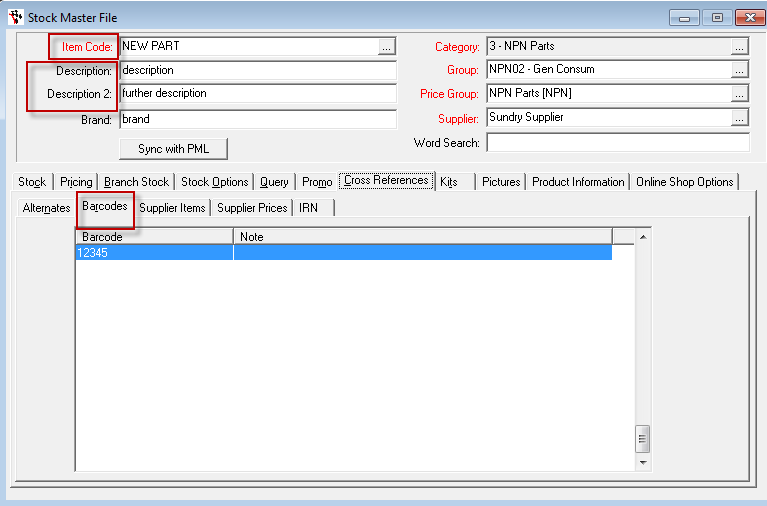
- Go to the Parts menu / Stock / Stock Master File
- Search & Select an item to associate to a barcode
- Go to BARCODE tab
- Scan or type bar code
- Note (Description of item)
- Type must = Barcode

- TAB to next line and repeat
2. Adding the Barcode to the Part from within the Customer Invoice
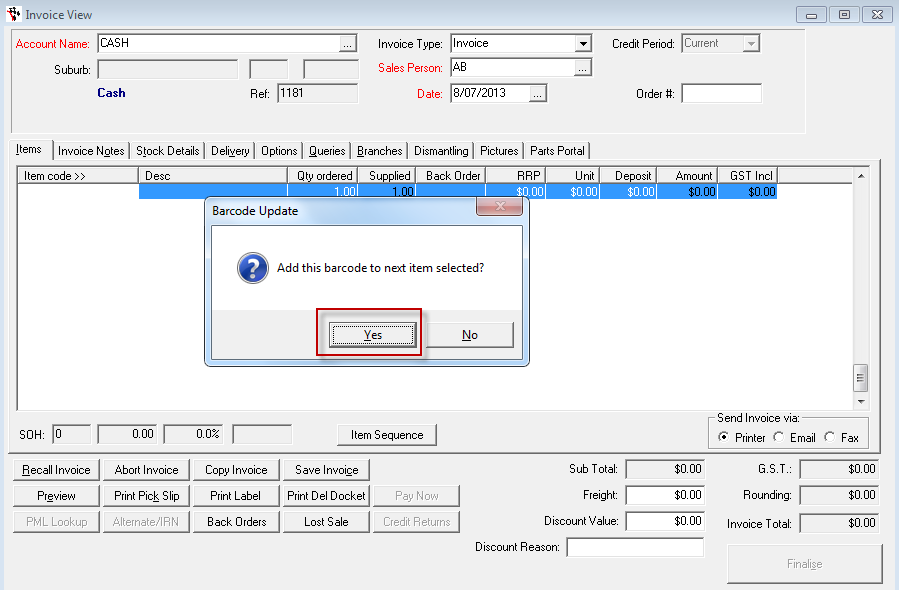
- Go to the Parts menu / Invoice / Invoicing select customer and tab through required fields and input data to the required fields
- In ITEM scan the barcode
- Say YES ”to add this barcode to next item selected”
- Search and Select item to associate to bar code

When a Barcode has been added to a Part
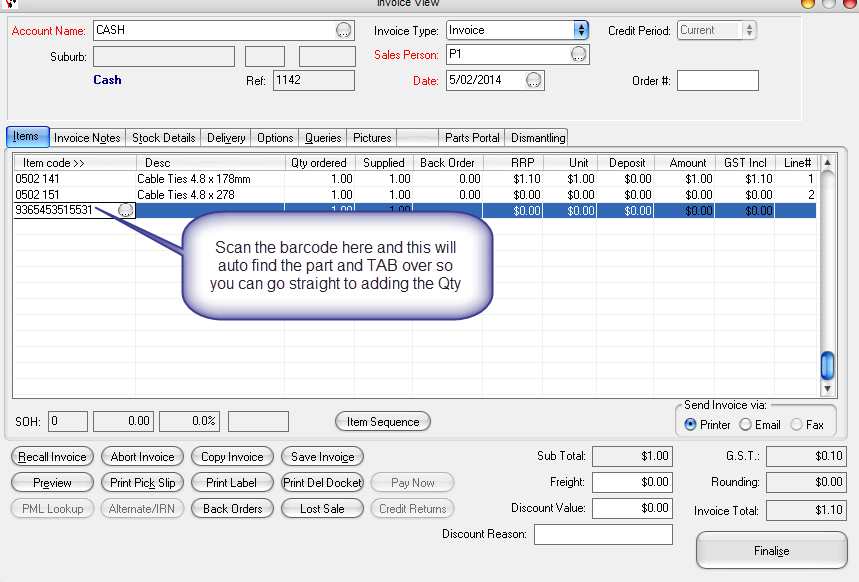
You can now scan the barcode in ANY invoice screen to add it to the invoice.
i.e. Parts Invoices, Workshop Invoices &/or Creditor Invoice
For example;

0 Comments