The purpose of this document is to learn how you can add a logo to your Autosoft system so they appear on your invoices. The process is simple and easy to do.
This guide has been broken up into 3 Parts - Saving the Logo on the Autosoft Server PC, Adding your Logo to Autosoft and Logo Options
Part 1 - Saving the Logo on the Autosoft Server PC
- A usable logo must be in a jpg format. We recommend you get a designer to make you an appropriate image and give it to you in a few different sizes so you can choose which one fits best.
- Save your jpg image file to Autosoft 5 folder on your Main Autosoft 'Server' PC. This is normally found in on the C:drive Autosoft5 - Bitmaps
- Go to Utilities – System Set Up – Branch Details
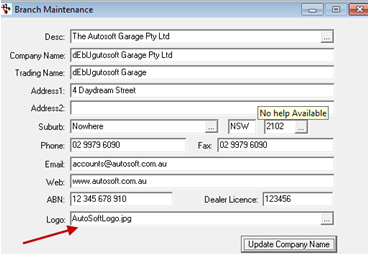
- This should open to the Bitmaps Folder
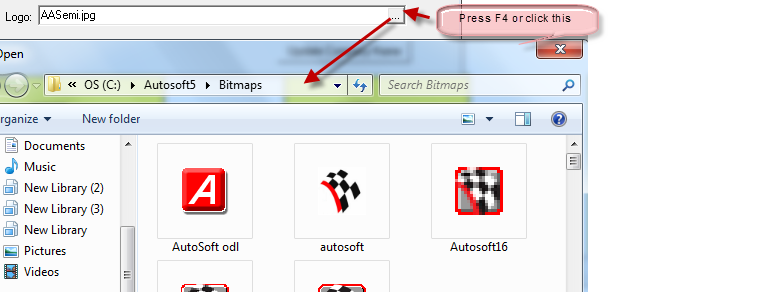
- Search and Select your logo file
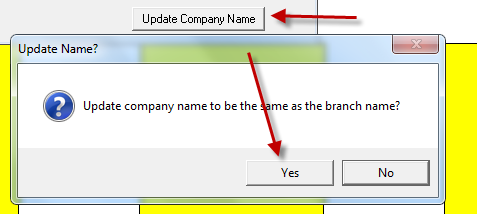
- Click on “Update Company Name” and click YES
- Go back to the first Desc field - F2 save
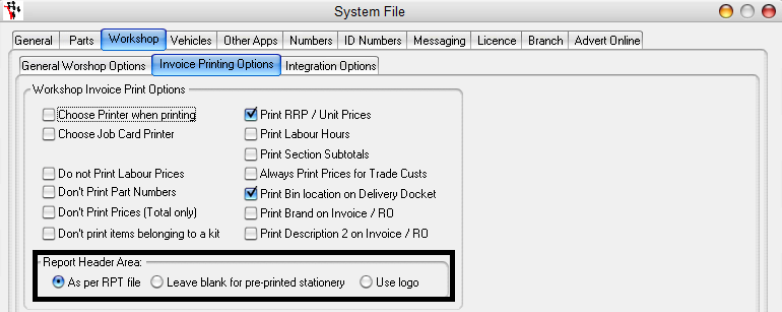
- Go to Utilities - System Setup - System File
- Workshop tab - Invoice Printing Options
- Report Header Area: - select option as applicable
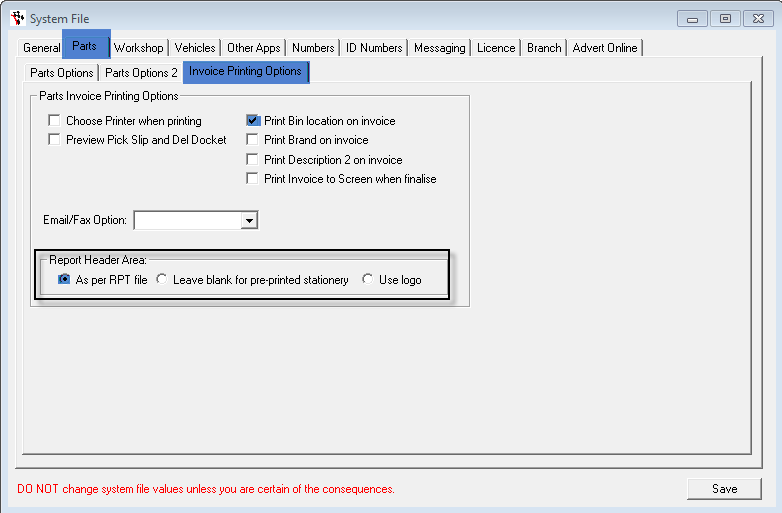
- Parts tab - Invoice Printing Options
- Report Header Area: - select option as applicable
4 Comments