The process of this document is to guide you on how to Setup that your workshop does Warranty services and how to put these through on a Workshop Invoice.
NOTE: To have access to this area - you must be logged in as a 'SETUP-PRO' security access user. Contact you companys manager or Autosoft for more information.
This Process has been broken up into Parts - Setup, Crediting the original purchase, requesting the credit from the supplier Making sure you have a Warranty Workshop Sale Type, Processing a Workshop Invoice with Warranty, Receiving the Warranty Payment back from the Creditor.
System Setup Before Processing: Workshop Sale Type for Warranty & System File
1. Create/Check you have an active GL for Warranty - also check with your accountant to see if the setup of this GL is suitable and if there needs to be any other GLs for step 2.
- Go to General Ledgers - General Ledger Accounts - Search and Select the GL OR Create one

- Restart Autosoft
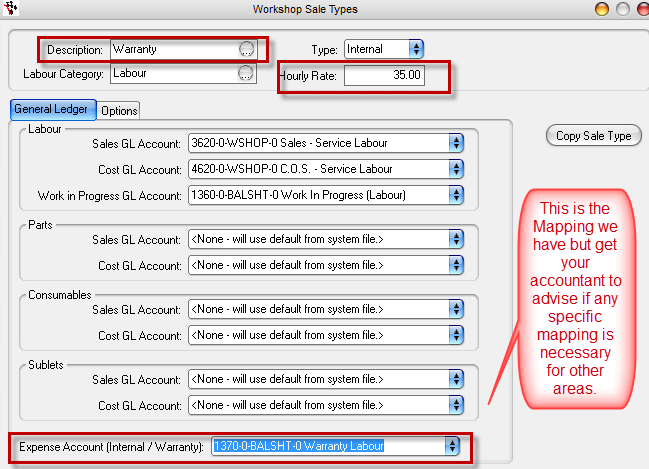
2. Create/Check you have a Workshop Sale Type for Warranty - also check with your accountant to see if there is any specific GL Mapping required.
- Go to Workshop – Workshop Sale Types
- Search and select the Internal Sale Type – Copy Sale Type
- Change the Description and Type to Warranty
- Enter the Hourly Rate it costs your business (i.e the hourly pay of the mechanic who will do the labour)
- Map the GLs as advised by your accountant.
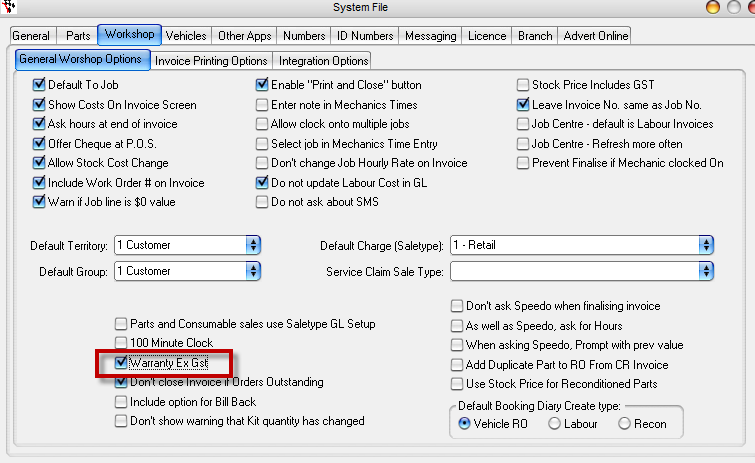
3. If the Accountant has advised Warranty Sales do not need to include GST
- Go to Utilities - System Setup - System File - Workshop - Tick option Warranty Ex GST
NOTE: We DO NOT advise you change any system settings without full knowledge of what you are doing as this area can change the functionality of your Autosoft. Please contact us for consultation BEFORE making any changes for if you make changes and you have to consult with us to revert the changes you have made, consultation charges will ensue.
- Restart Autosoft
1. Refund the Original Purchase
- Refund the customers original invoice as per normal.
If it was a Workshop Invoice http://service.autosoft.com.au/entries/21310594-How-to-Credit-or-Refund-and-Copy-a-Workshop-Invoice OR
If it was a Parts Invoice http://service.autosoft.com.au/entries/21460319-How-to-Credit-Refund-or-Reverse-Out-a-Parts-Invoice
This will put the item back in stock so you can then send it back to the supplier. If you have another in stock, you can then warranty invoice that straight out (Part 3) or if you have to wait for the supplier to replace it first, follow Part 4 then Part 3 as necessary.
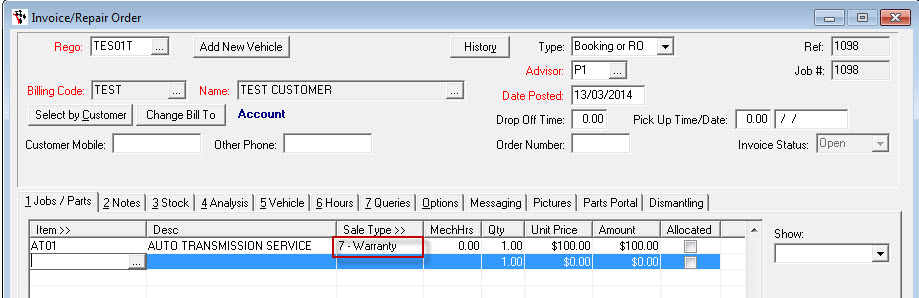
2. Re invoicing a Replacement Part to the Customer under Warranty
- Go to Workshop – Invoice/RO – Select all usual Rego, Type, Adviser, etc
- Jobs/Parts – select your labor or part then change the Sale Type to ‘Warranty’
- You can record any further details/notes for the Warranty under the Vehicle > Warranty/Notes Tab
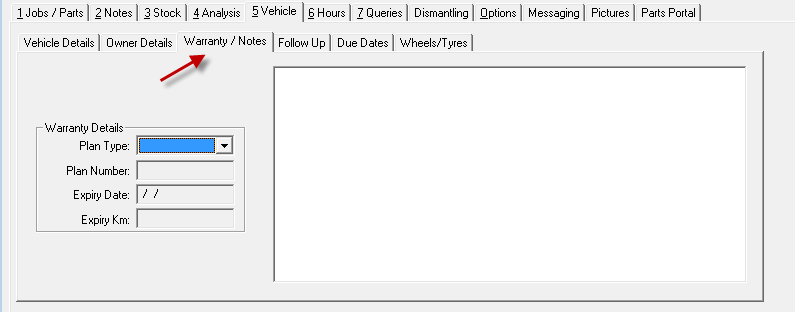
NOTE: You will also see there is a Warranty Plan section which is an additional area you can set details in instances where a manufacturer has set a plan recall warranty and you have to state as such or reporting/claiming purposes. These can be setup. Refer to F1 Help: http://www.autosoft.com.au/f1help/index.html?CodeTypeSetup
If the manufacturer is paying for part of the invoice, then you will need to follow this guide to setup and charge:
http://service.autosoft.com.au/entries/21326823-How-to-split-up-payment-of-an-invoice-to-multiple-payees
- At the bottom of your invoice you will see your Warranty total
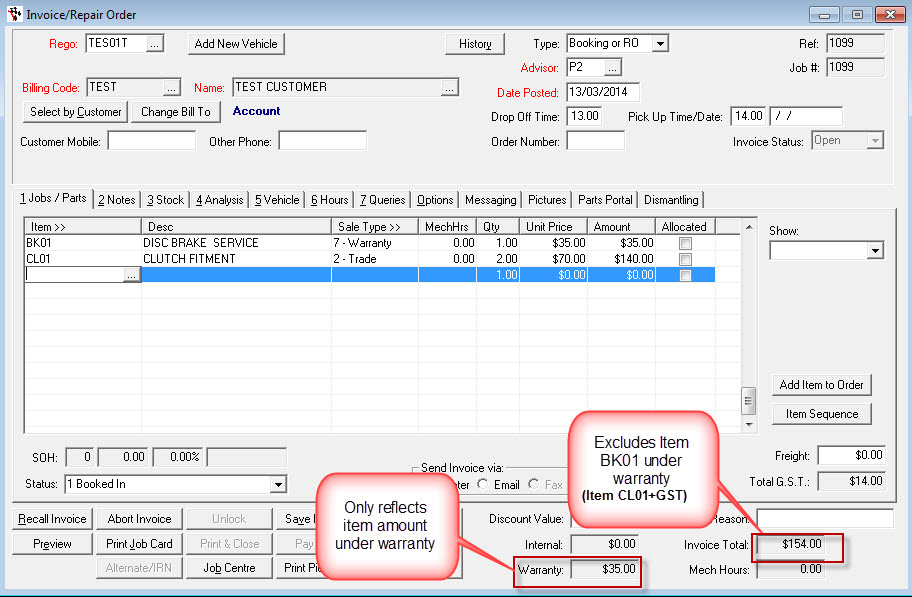
Note: This amount is excluded from the actual payment total - for example if this is a CASH customer who also had some non warranty charges, the POS Payment screen will only show the remaining amount to be paid
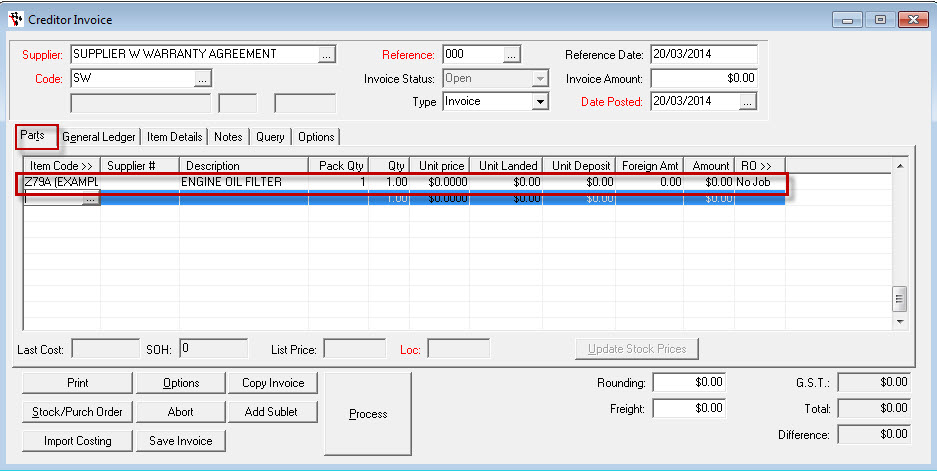
3. Receive the Replacement Part from the Supplier
- Do a Credit Invoice
- Add the Part that was replaced at the cost it was replaced (e.g this may be $0.00) as well as any other parts they have supplied you on this invoice.
- If they also gave you some money back for the labour, use the General Ledger Tab to enter this. Enter the amount in (-) Negative as this is to rebate the Warranty Expense GL.
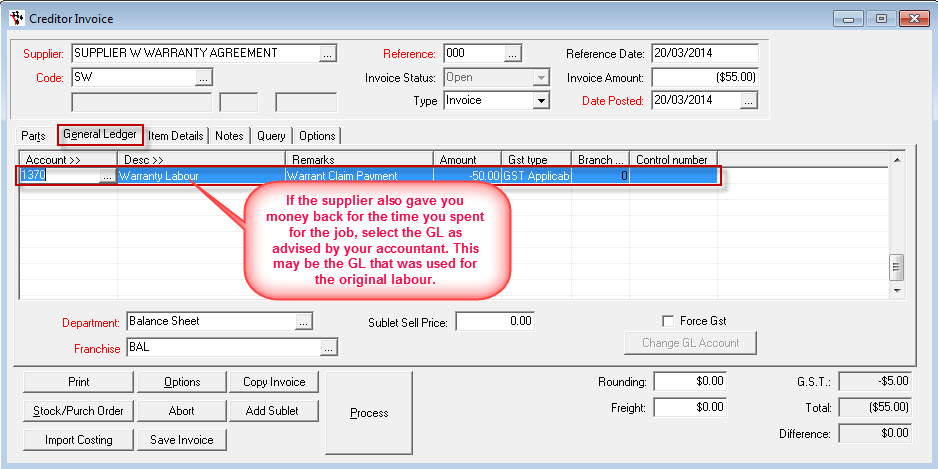
This will put the replacement part back in stock and credit the amount from the balance on the creditor.
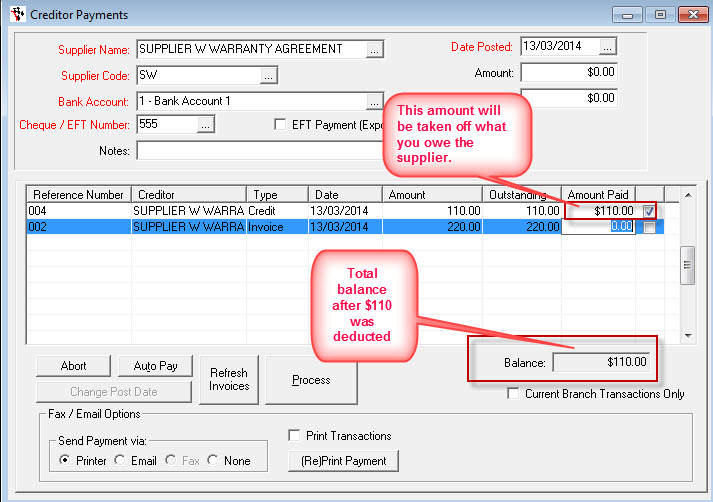
4. Clearing the Warranty Claimed from the GLs (if applicable)
- If this balance will simply be taken off what you owe the supplier, the next time you need to do a Creditor Payment to them, simply tick the credit transaction to reduce the total balance you have to pay them
- If they have given you the money back and a replacement part - process a negative Creditor Payment
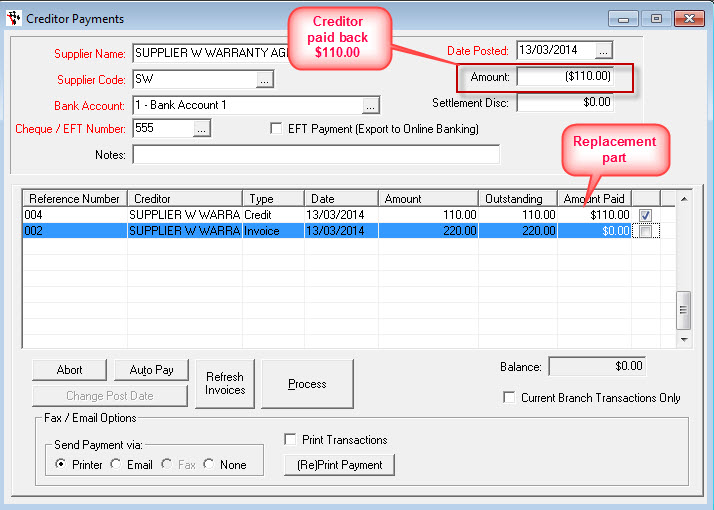
-
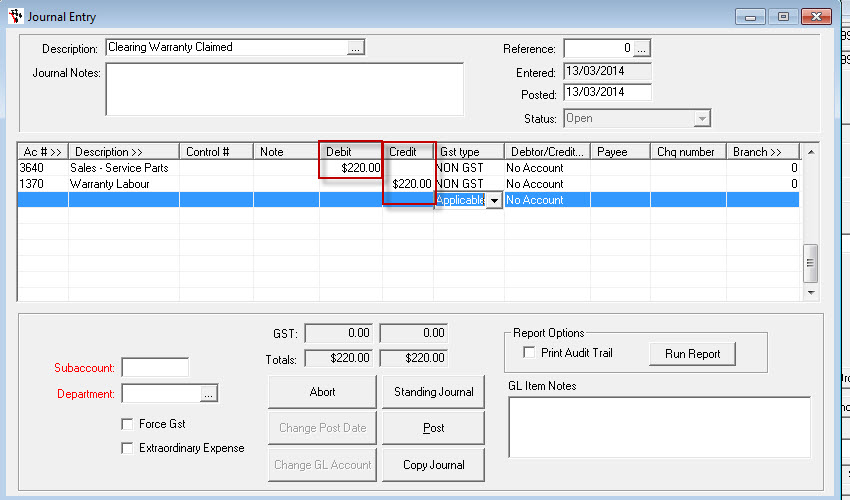
Journal any amounts Outstanding in the GLS - e.g. Debit the Sales Account and Credit the Warranty GL once all has been reconciled AS ADVISED BY YOUR ACCOUNTANT if applicable.


2 Comments