The purpose is to demonstrate how the booking diary works
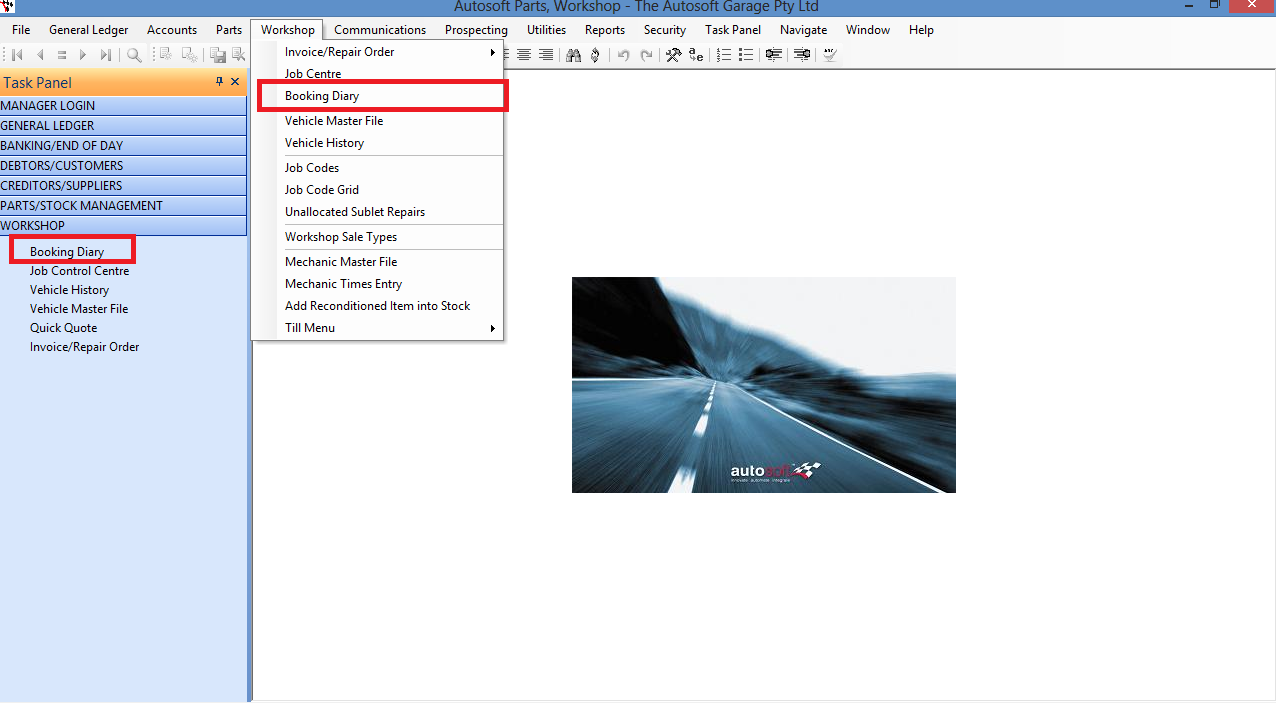
- Go to Workshop - Booking Diary
- Click Create New Booking
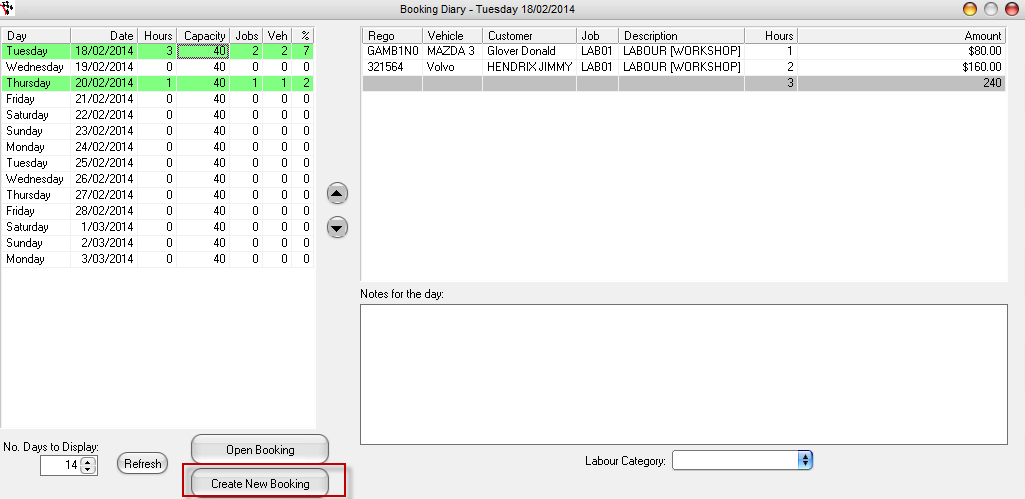
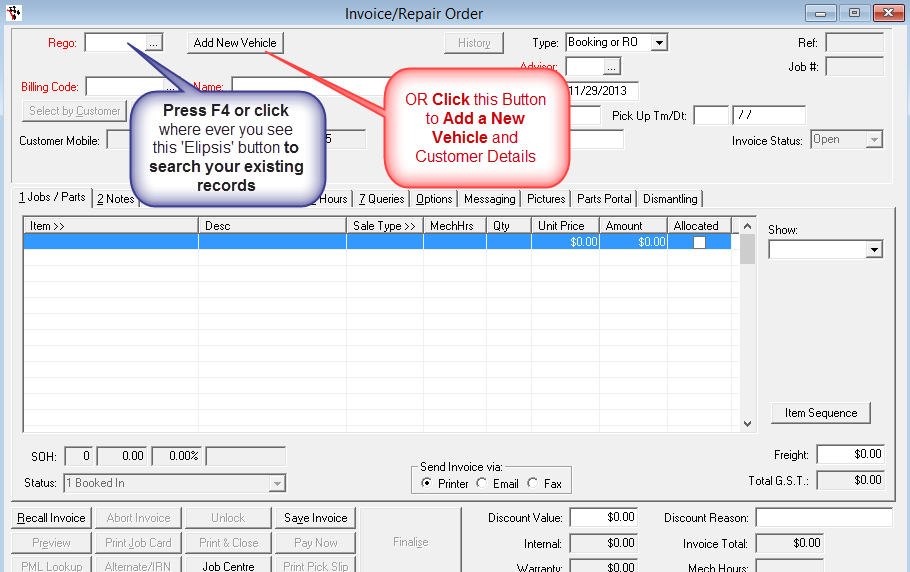
Note: This will take you to invoice / repair order screen.
__________________________
If the customer is new and has not been to you before;
- Click Add New Vehicle
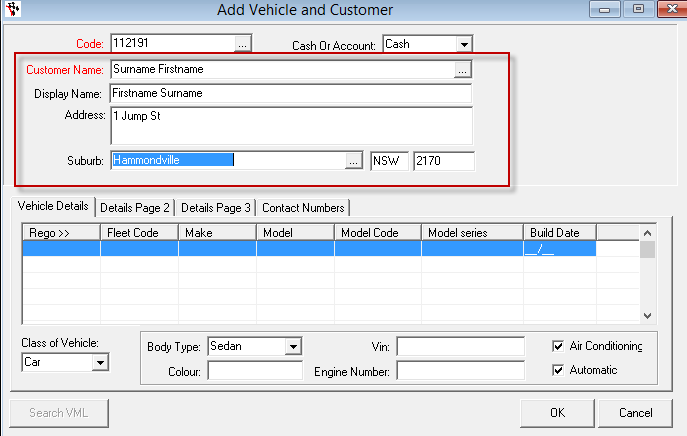
- Enter the Customer Details;
- Code: This is an auto-created code for the customer.
- Cash Or Account: Choose Cash (the customer pays for their invoices straight away by any Payment method Cash/EFT/Cheque etc) OR Account (the customer is allowed to charge their invoices to an account which they can pay later)
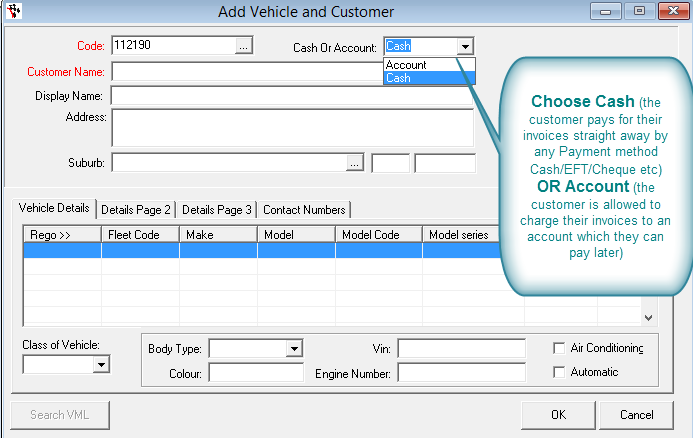
- Customer Name: We recommend you enter the customer details as SURNAME FIRSTNAME as this helps when you need to search for the customer by surname in future. This may also be the customers Company Name if they are a business customer.
- Display Name: This is the name that will print on the customers invoice, so we usually recommend their FIRSTNAME SURNAME or company name again.
- Address: Enter their Address details if necessary
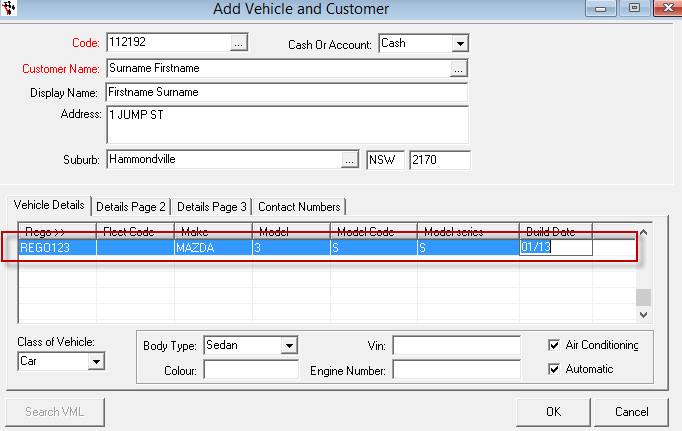
- In the same screen go down to the Rego>> field and add all the Vehicle details;
- Rego, Fleet Code, Make Model, Model Code. Model series, Build Date: Enter all these details as necessary (you can add as little or as much as you like)
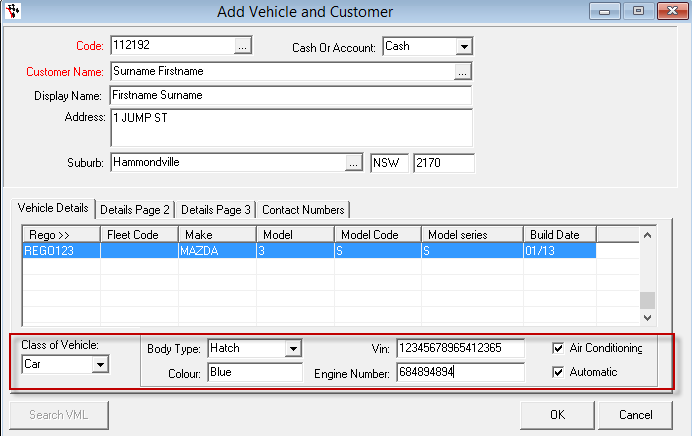
- Class of Vehicle and other options along the bottom of the screen: Enter all these details as necessary (you can add as little or as much as you like)
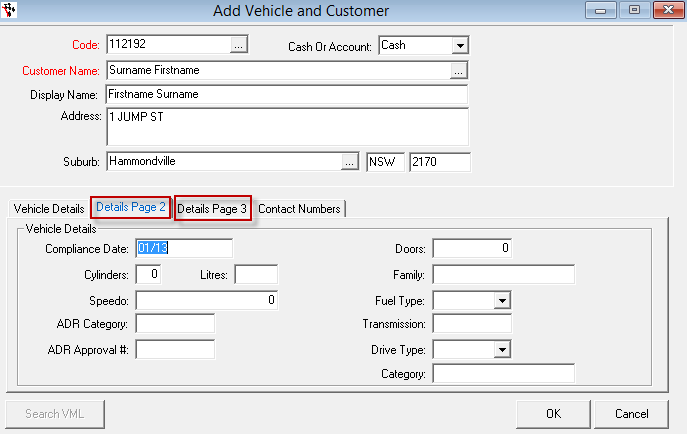
- Details Page 2 & 3 Tab- If you also want to add further details like the current speedo and more in depth details on the vehicle go to these tabs
- Contact Numbers Tab - Enter in all the contact details you have for the customer;
- Name: Enter the main contacts Name again
- Type: Select the Type of contact details you have from the list of options
- Number: Enter the number or email as per the contact type
- Email/Fax: If you would like to be able to Email or Fax the Customers Statements, Invoices or Both, select the option as applicable. If you always want to print their statements and invoices, leave this blank.
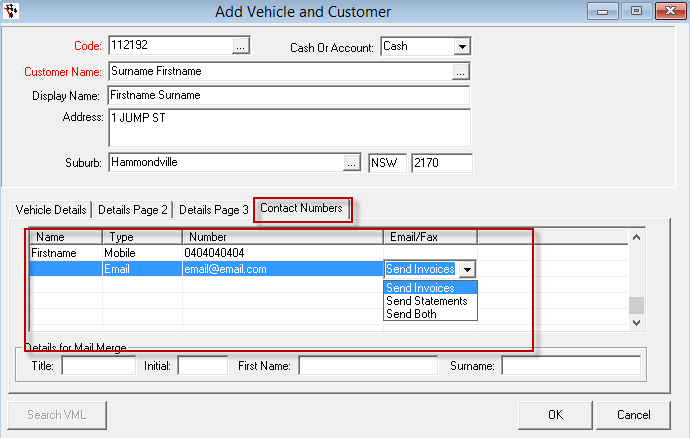
- OK to Save and Close this screen and their details. If you made a mistake or need to add an additional vehicle for the same customer, click back on the Add New Vehicle button.
________________________
If the customer is an existing customer already in the system;
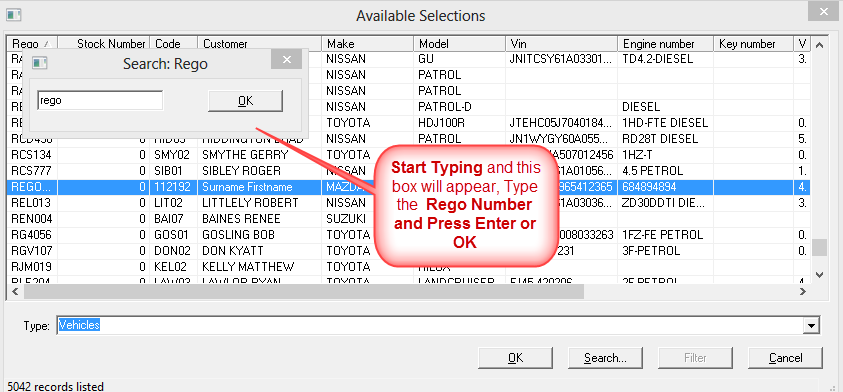
- In the Rego field press F4 to search
- If you have the customers Rego Number, start typing it in and press Enter or click on OK to sort the search results by this field.
- If you do not have their Rego Number, simply click in any of the other column fields and start typing it in and press Enter or click on OK to sort the search results by this field.
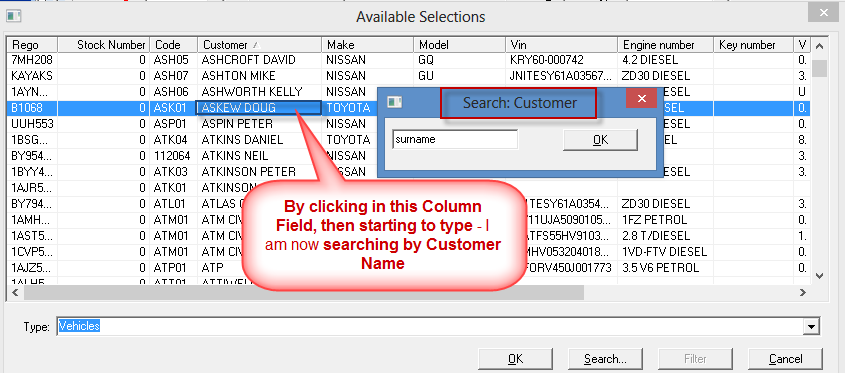
- Once you have found the customer you are looking for - press Enter or Click OK
_____________________________
- TAB until you get to the Advisor field - Press F4 to search and Select yourself from the list
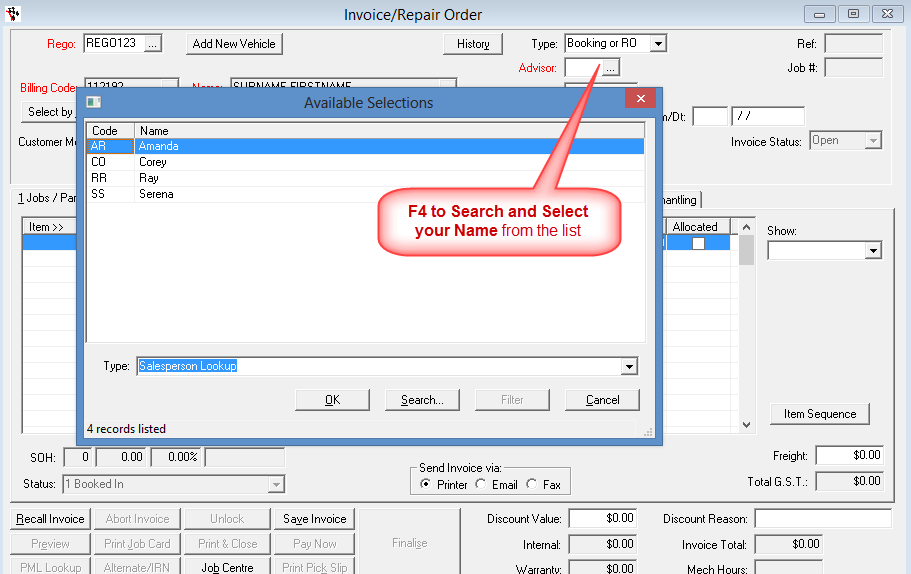
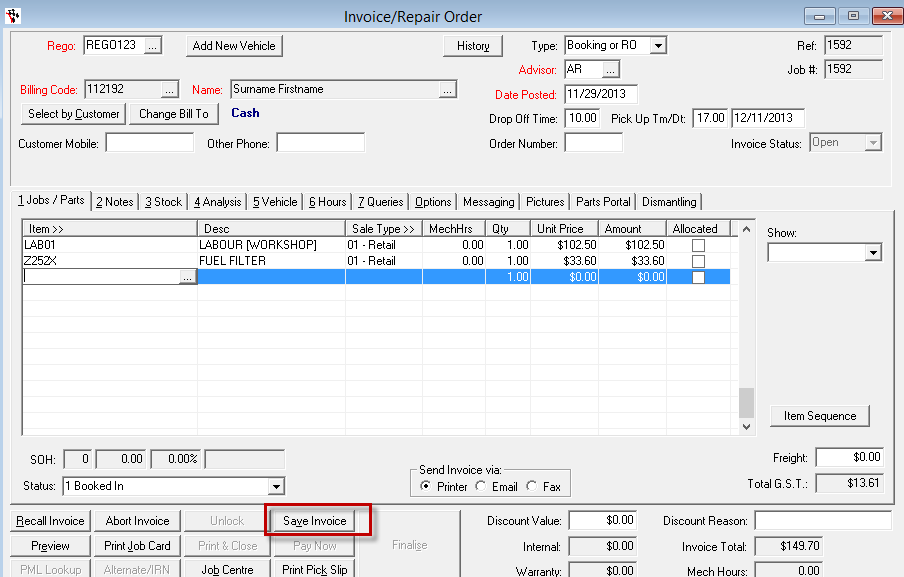
- Keep TABing to enter any additional details for the booking, e.g the Drop Off/Pick Up time as necessary (NOTE: the time are in 24hr time)
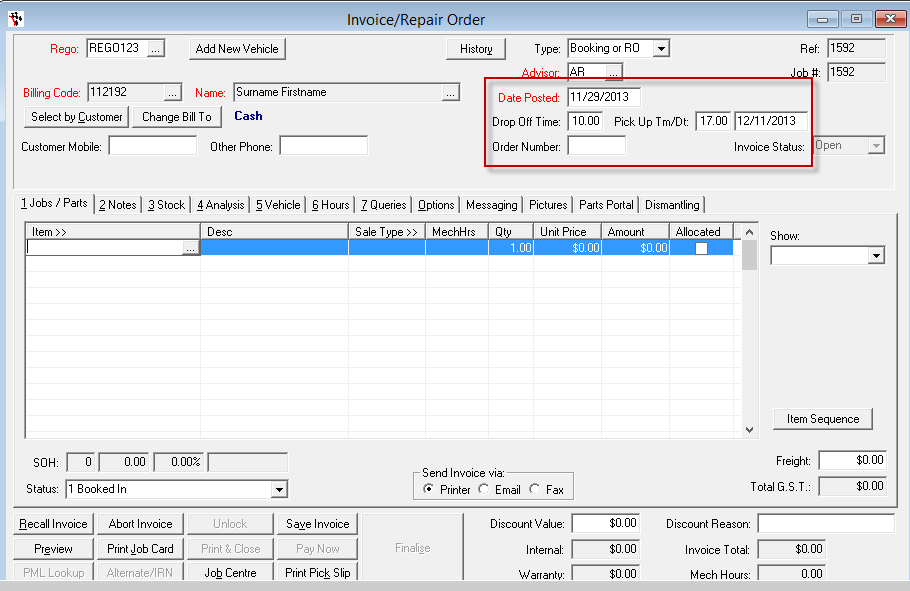
- In the Job/Parts Tab, click in the line and If you know the Labour/ Part Code you can type in code and TAB OR F4 to search and select one. The same searching options apply, click in the column field you would like to search by and start typing.
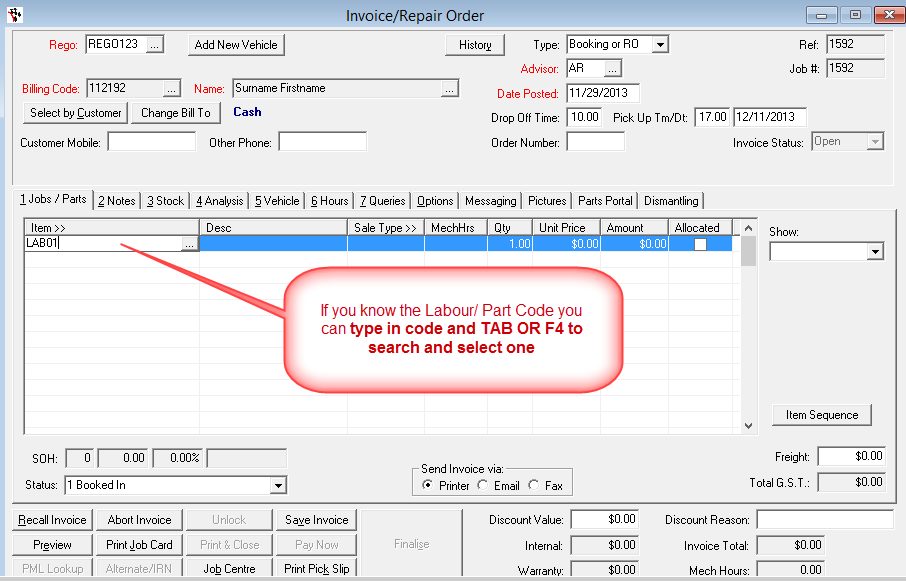
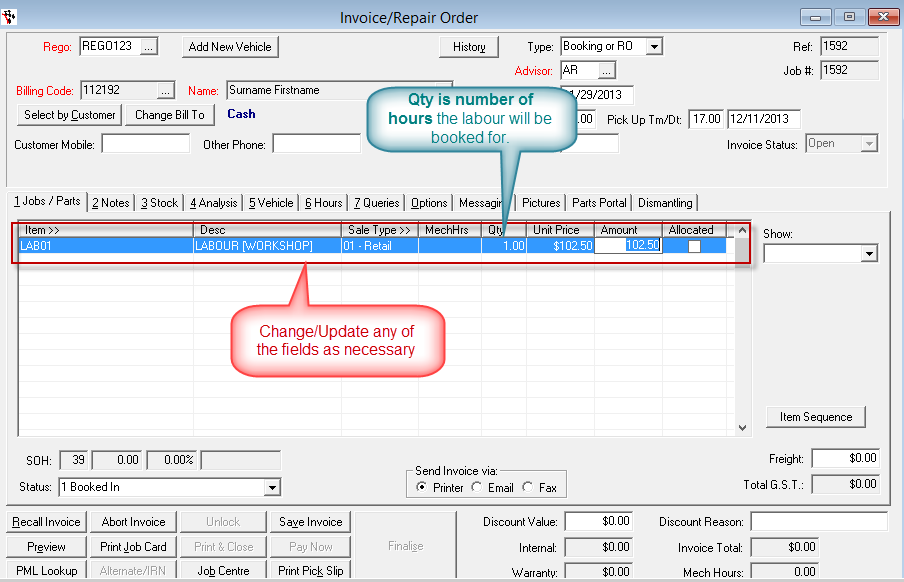
NOTE: A General Labour you can use is LAB01, this is a default Labour Code entered in every new clients autosoft system.
- TAB and change any of the fields as necessary e.g the Qty is the number of hours for the booking.
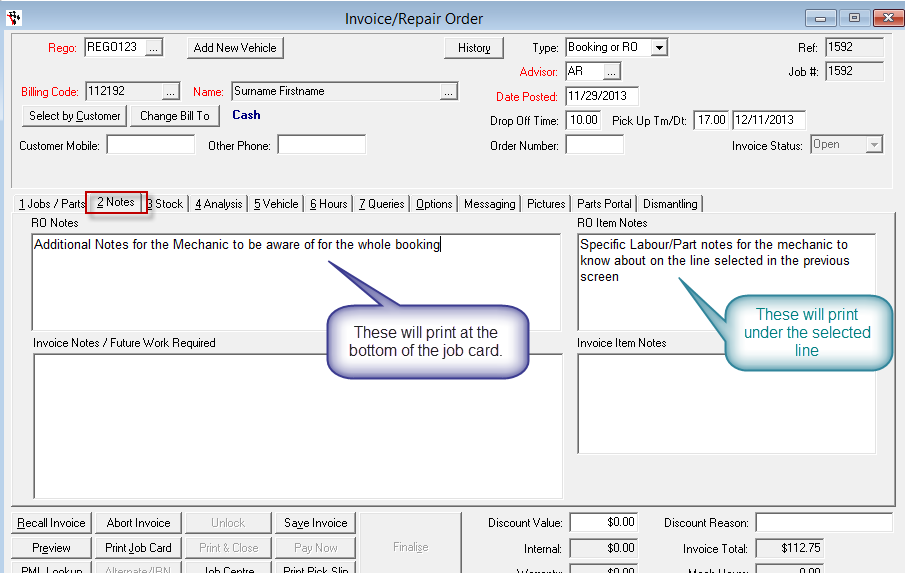
- Go to the Notes Tab to add any story or details you want to put on the job card for the mechanic to be aware of.
- Go back to the Job/Parts to add any thing else on as necessary
- Save Invoice to save the booking.
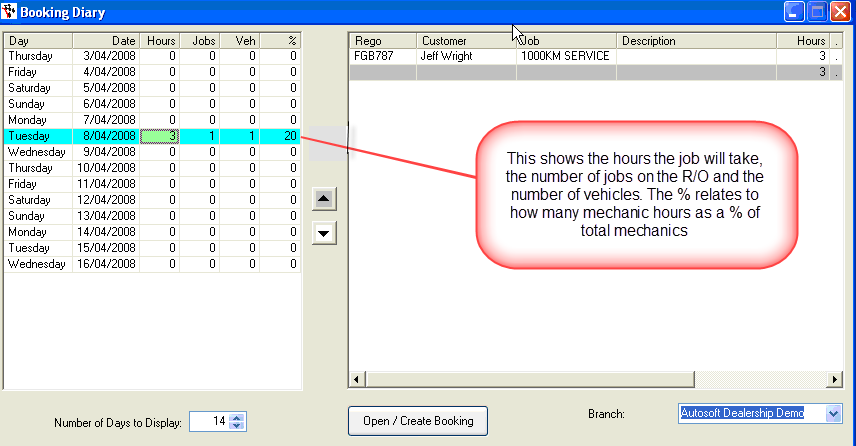
- Go back to the Booking Diary you will see the booking made
2 Comments