The Purpose of this guide is to show you how to take a deposit on a vehicle (if necessary) then process the full vehicle sale. This is part of a series of dealership guides available here http://service.autosoft.com.au/entries/22704289-Dealership-Guides-Overview.
NOTE: This function is for the Dealership Module in Autosoft only. If you would like more information please contact us.
This guide has been broken up in to 2 parts you can follow as necessary - Taking a Customer Deposit on a Vehicle, Selling a Vehicle and Processing the Debtor Receipt &/or Finance Company Payment Received
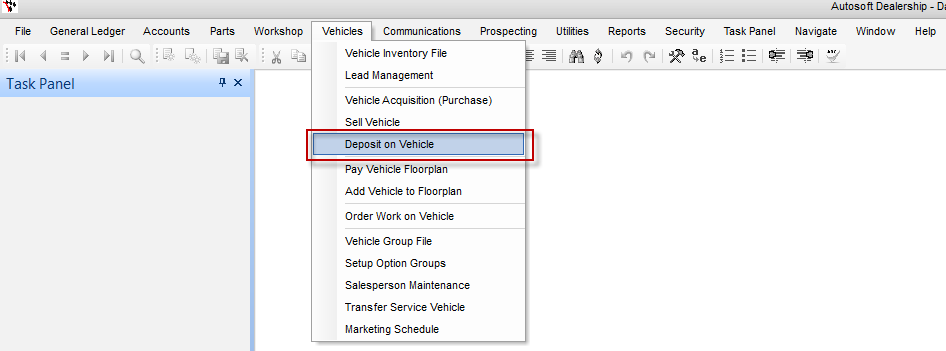
1. Taking a Customer Deposit on a Vehicle for sale
- Go to Vehicles - Deposit on Vehicle
- Enter the Deposit Details;
- Reference - If you have Started and Saved a Sell Vehicle Invoice, Select it or Leave Blank and the system will Auto-create a Reference Number
- Date Posted - The Date the deposit was taken
- Amount - The Deposit amount they are paying
- Bank Account - The account the funds will go in to. If the payment is via Cash, Cheque, Crd/EFT then we recommend you leave it as the default Undeposited funds. Only if you have already received a Direct Debit Payment in you Bank should you select the Bank Account.
- Account Name - Select or Add Customer who is Paying Deposit
- Stock Number - Select the Vehicle Stock they are paying to deposit towards
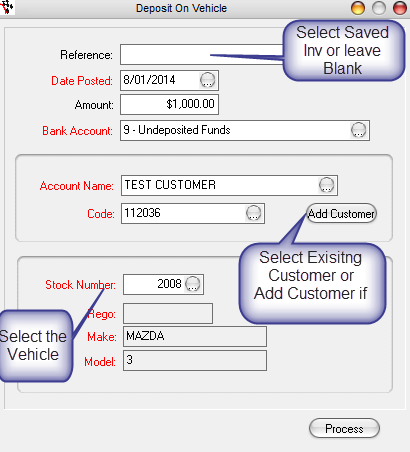
- Process - then follow prompts to finalise payment method and details.
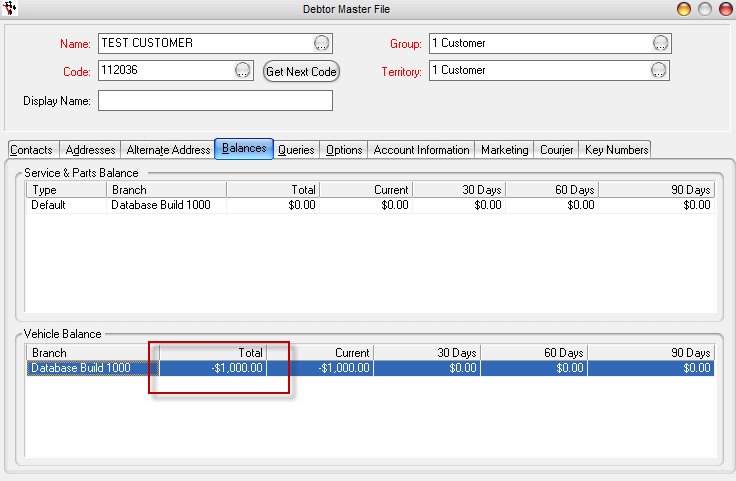
This will then record the Customer Deposit in their Debtor Master File as a Negative Vehicle Balance as their Account is in credit of the Deposit amount (as they have not yet made the full payment of the vehicle)
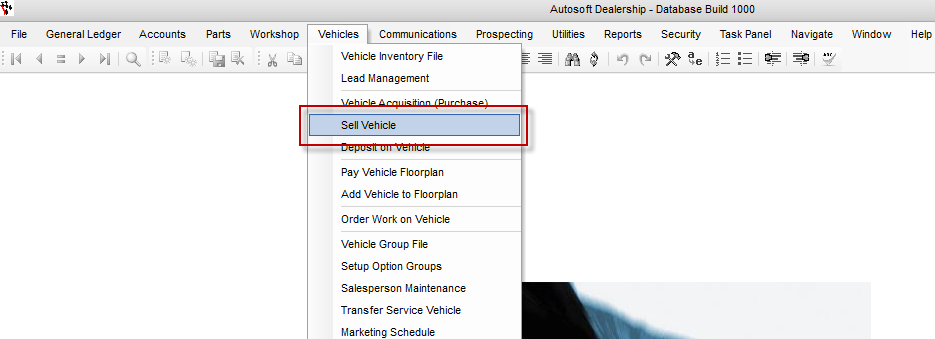
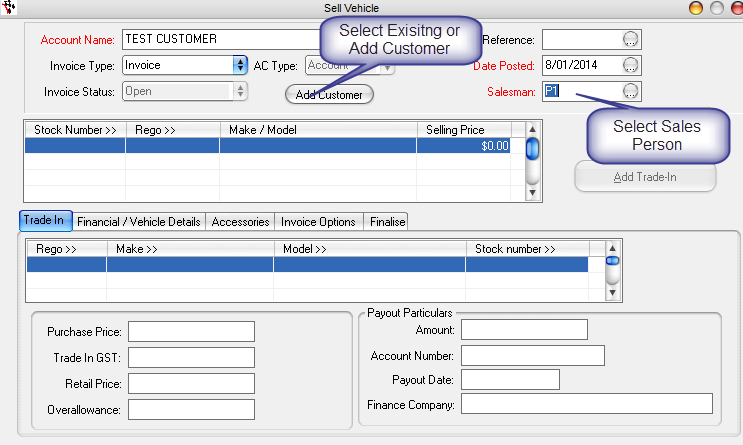
2. Selling a Vehicle
- Go to Vehicle- Sell Vehicle
- Enter the Customer Purchase Details;
- Account Name - Search and Select an existing Customer or Add Customer to create a New customer (then add their details, the press OK)
- Reference - If you have already started or want to look up a previous sale, F4 to search OR leave blank and the system will auto-generate a reference number
- Date Posted - Enter the Date of the Purchase
- Salesman - Select yourself or who you would like the Sale recorded against
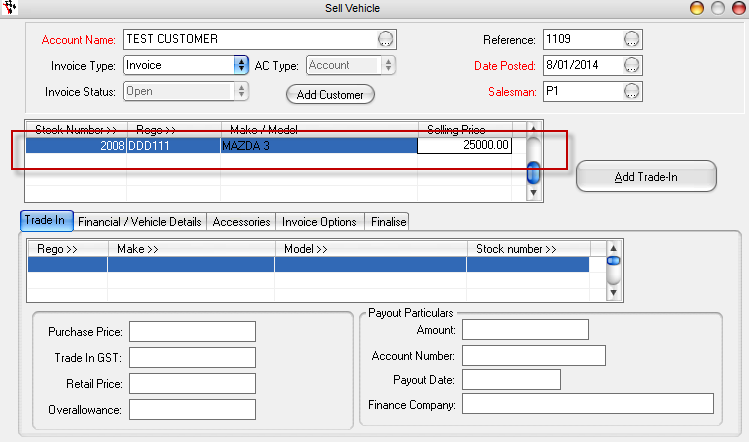
- Add the Vehicle Details;
- Stock Number - Search and Select the Vehicle Stock Number
- Rego - if you have already Creditor Invoiced the Rego for this vehicle (as per this guide http://service.autosoft.com.au/entries/23042635-How-to-Order-Invoice-Internal-Or-External-Work-and-Purchases-on-a-Vehicle-for-Sale) Enter the Rego Number here. If not you can leave it blank (if you are not selling it with rego) OR enter an un-attached Rego number here (note this will not add the rego cost details to the financials of the vehicle)
- Selling Price - Enter the Total inc GST Sell Price (do not deduct any amount paid by deposit)
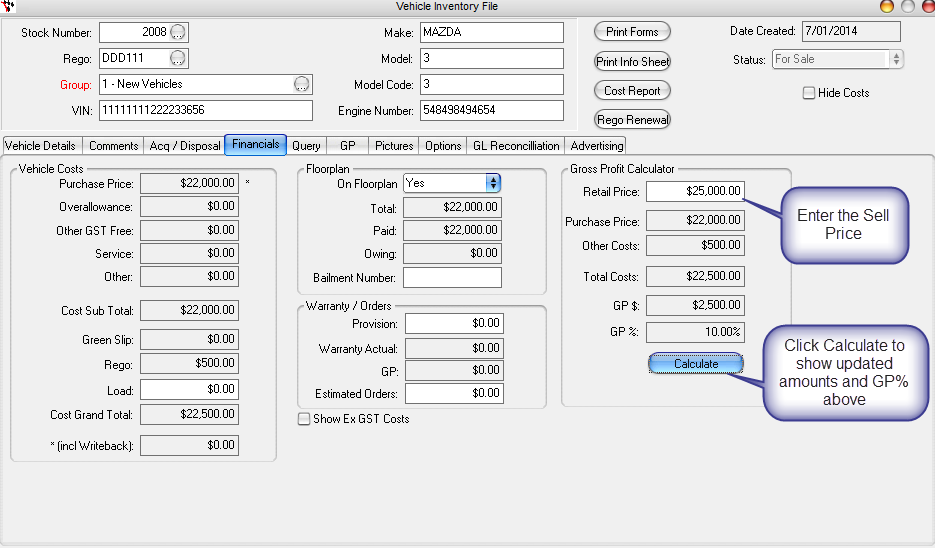
NOTE: You can go to the Vehicle Inventory File - Search and Select the Vehicle and go to the Financials Tab at any time to see all the current costs to the vehicle to make sure you will be making a profit.
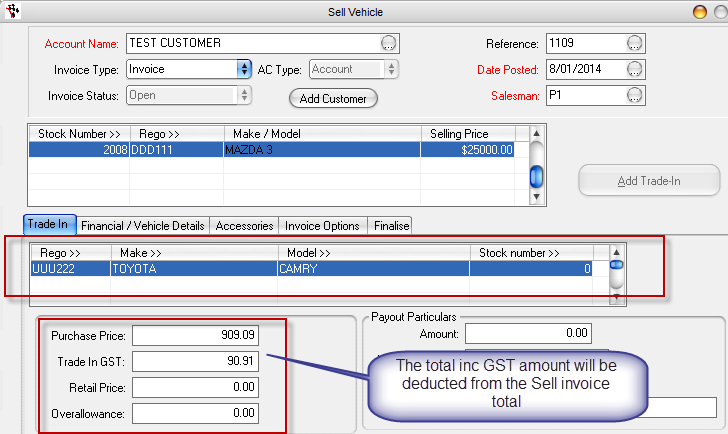
- If you are also accepting a Trade in to reduce the price of this purchase, click Add Trade In
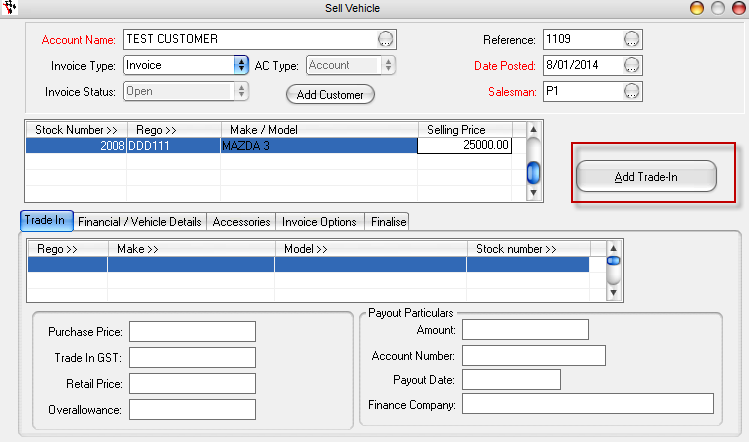
- Enter all the Trade In Vehicle Details, Acquisition Detail , Finanical Details, Vehicle Details and Floorplan tab details as applicable
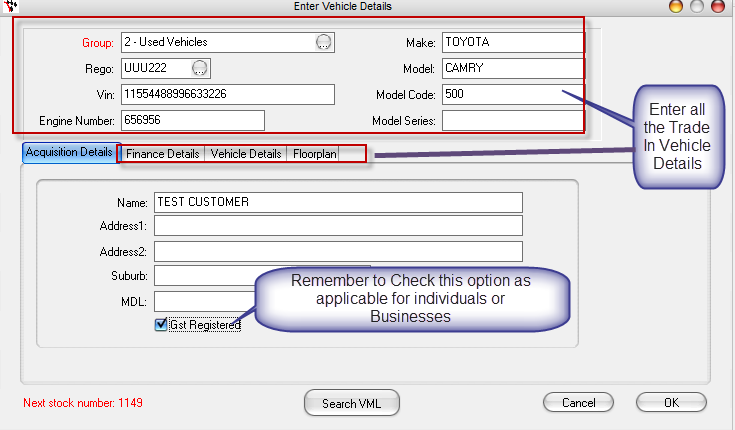
- Select OK to add the vehicle to Stock and to the Sell Invoice - for example I accepted their Toyota Camry for $1000
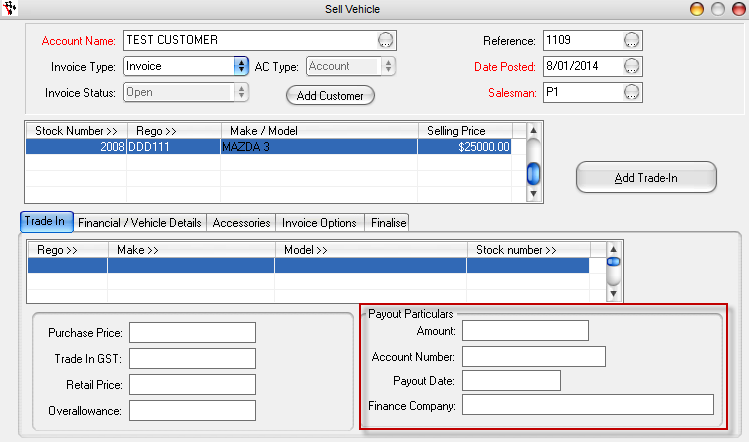
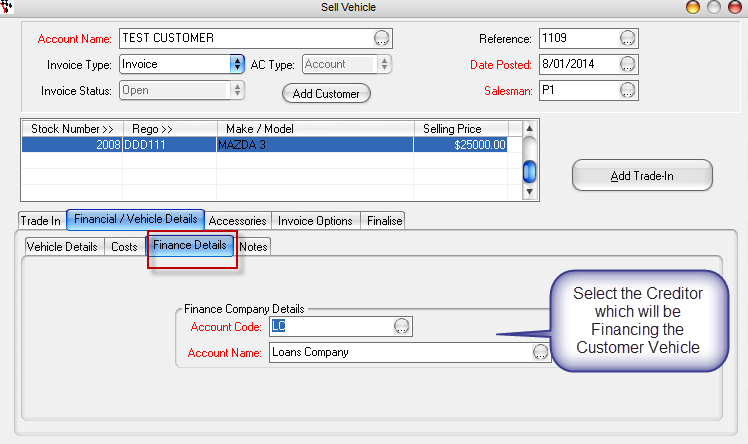
- If the Vehicle is being Financed -Enter in the Payout Particulars
- Go to the Financial/Vehicle Details Tab - Enter Details as applicable. e.g
- Speedo when sold
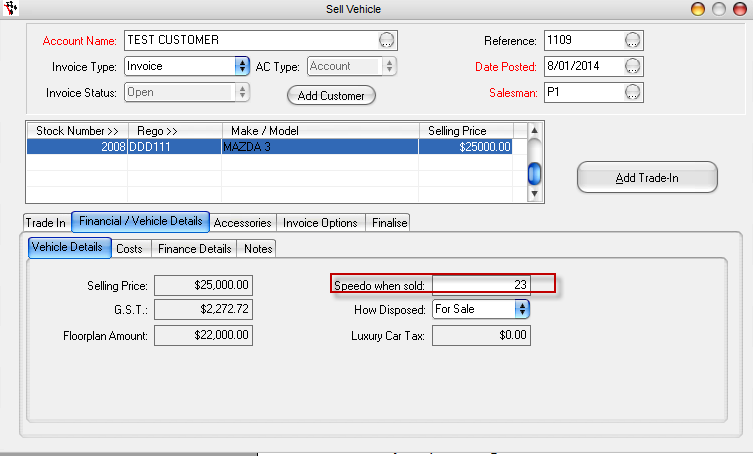
- Financial Details sub-tab
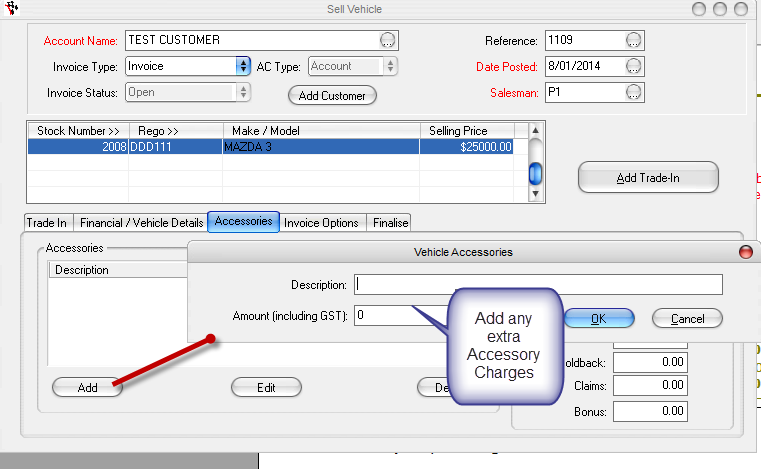
- If you are charging for any Extra Accessories - Go to the Accessories Tab and Enter the Details
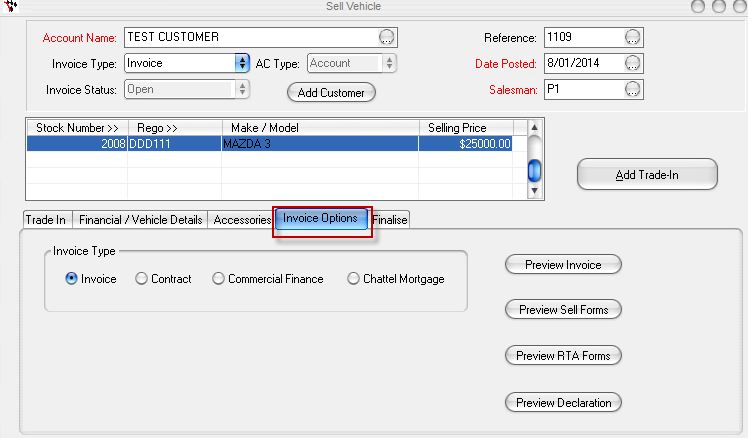
- Go to Invoice Options Tab - To Preview and Print Invoices, Forms and Declarations as necessary
- Go to the Finalise Tab - Enter any further details then Finalise & Print

- Select Yes to the prompt to print and process
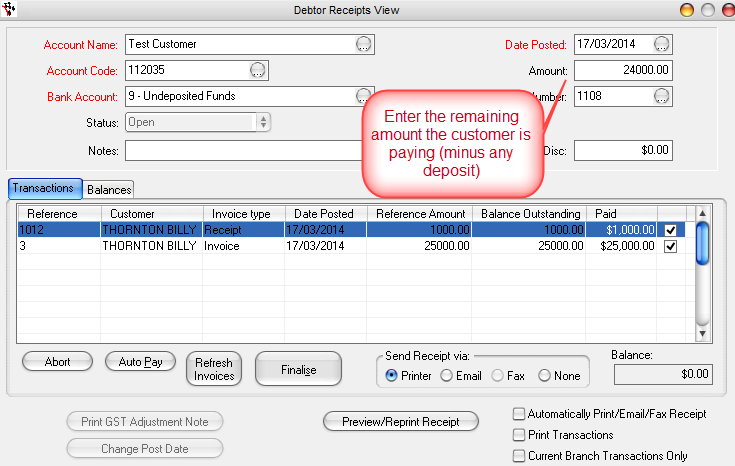
3. Processing the Debtor Receipt for the remaining Customer Payment Received
Finalise the remaining amount the Customer needs to Pay via Debtor Receipt
- Go to Accounts - Debtors - Debtor Reciepts
- Enter the Payment Details
- Click AutoPay
- Finalise
0 Comments